Lab Exercise: Exposing a new model in 3Scale
Now that you have seen a bit of 3Scale, it is time to put a new model in there but this time running in a GPU which will give us the performance we are missing.
Deploy a new model onto RHOAI
For this we’ll use another ai-accelerator-example named vllm-modelcar-serverless.
Follow these steps:
-
Go to your terminal on the ai-accelerator-examples repo you previously cloned.
-
Run
./bootstrap.sh -
Select this time the example
vllm-modelcar-serverless, number 5 in this output:
At this point you might be thinking, "wait, is this ok to run bootstrap again?" and yes, it is the aim of this
ai-accelerator-examplesto maintain flexibility. Each example is independent from each other, and all we are doing is enhancing our cluster with the new bits that allow the rapid experimentation! -
This will create a new project
vllm-modelcar-serverlesswhere a newInferenceServicewill be created for thegranite-3.3-2b-instructmodel. It might take up to 10mins or more before the model is ready, since this will trigger a GPU node auto-scale. Meanwhile we can continue configuring 3Scale.
Add a new backend & product to 3Scale
Now, setting up a new Application in 3Scale Gateway requires a set of resources and configuration. This time around we won’t use GitOps but straight a manual setup which work fine for our purposes of testing this new model exposed in 3scale.
-
Download this oc template file in a local directory: APICast CRDs
-
Let’s get the URL for the serving model
GRANITE_URL=$(oc get -n vllm-modelcar-serverless inferenceservice -o json | jq -r '.items[] | select(.status.url) | .status.url') -
Now let’s apply the resources in the downloaded template file
oc process -f apicast_crds.yaml -p GRANITE_URL=$GRANITE_URL | oc apply -n 3scale -f - -
This has created the backend, product and promoted those to production 3scale. Now we need the dev1 to subscribe to this application.
-
Navigate to the 3Scale Admin portal.
oc get routes -n 3scale -o json | jq -r '.items[] | select(.spec.host | contains("maas-admin")) | "https://"+.spec.host' -
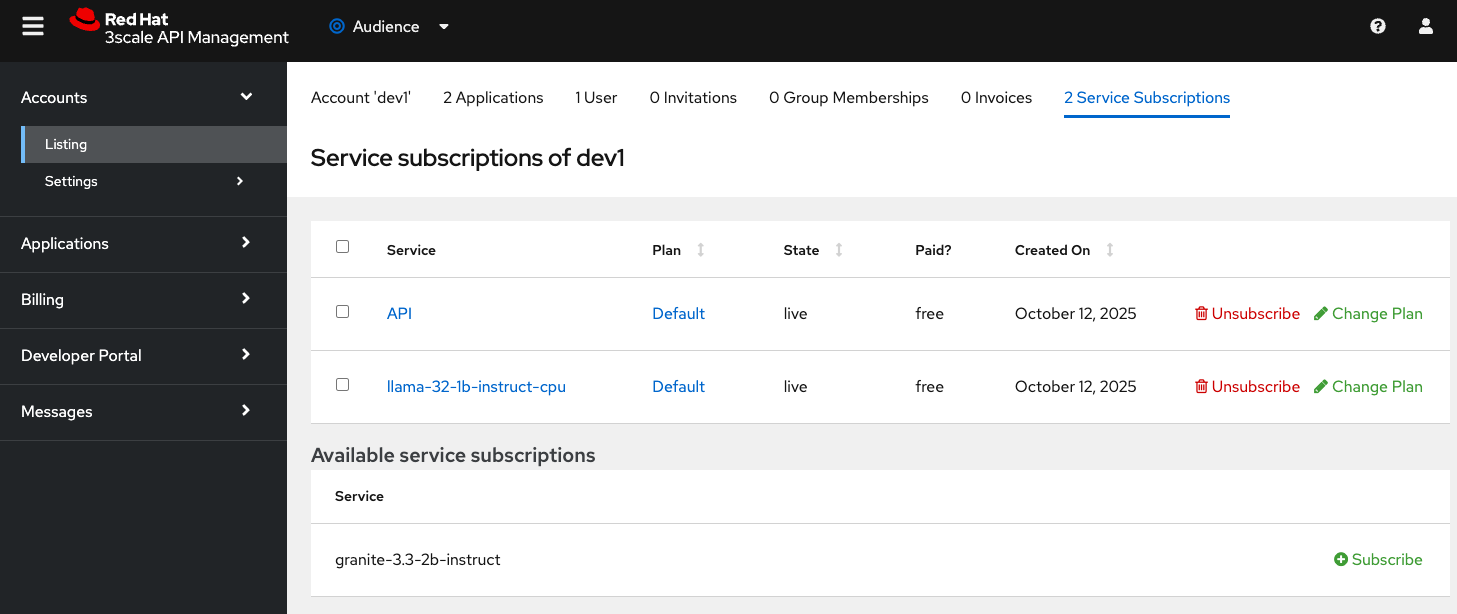
Go to Audience → Accounts → Listing → dev1 → Service Subscriptions
-
-
Click subscribe in the granite-3.3-2b-instruct available service subscription.
-
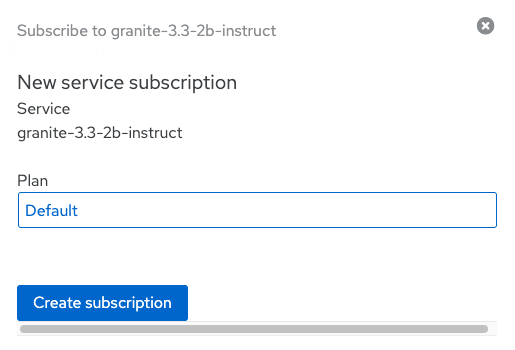
Select the Default plan and click Create subscription
Developer creates API Keys for this new application
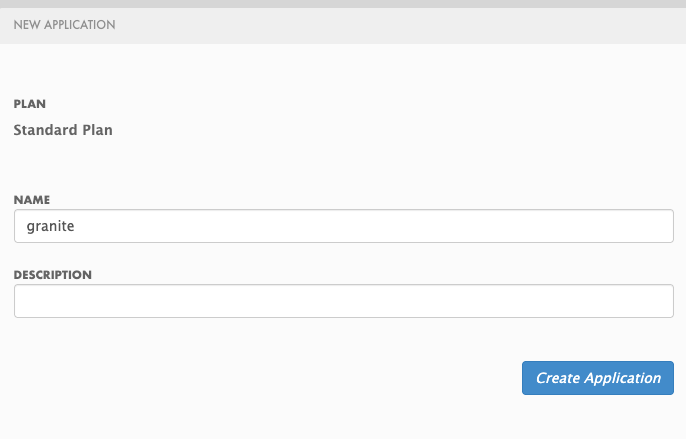
Now the developer can create an application and obtain an API Key from the developer portal. You can follow the same steps you did in the previous section when we accessed the model in the developer portal. This time you will create a new application using the Create New Application button and filling it this form:
You should be able to see a new application with its key that can be used in AnythingLLM.
You can achieve that by following steps in previoussection: Developer portal Model url, key and name
|
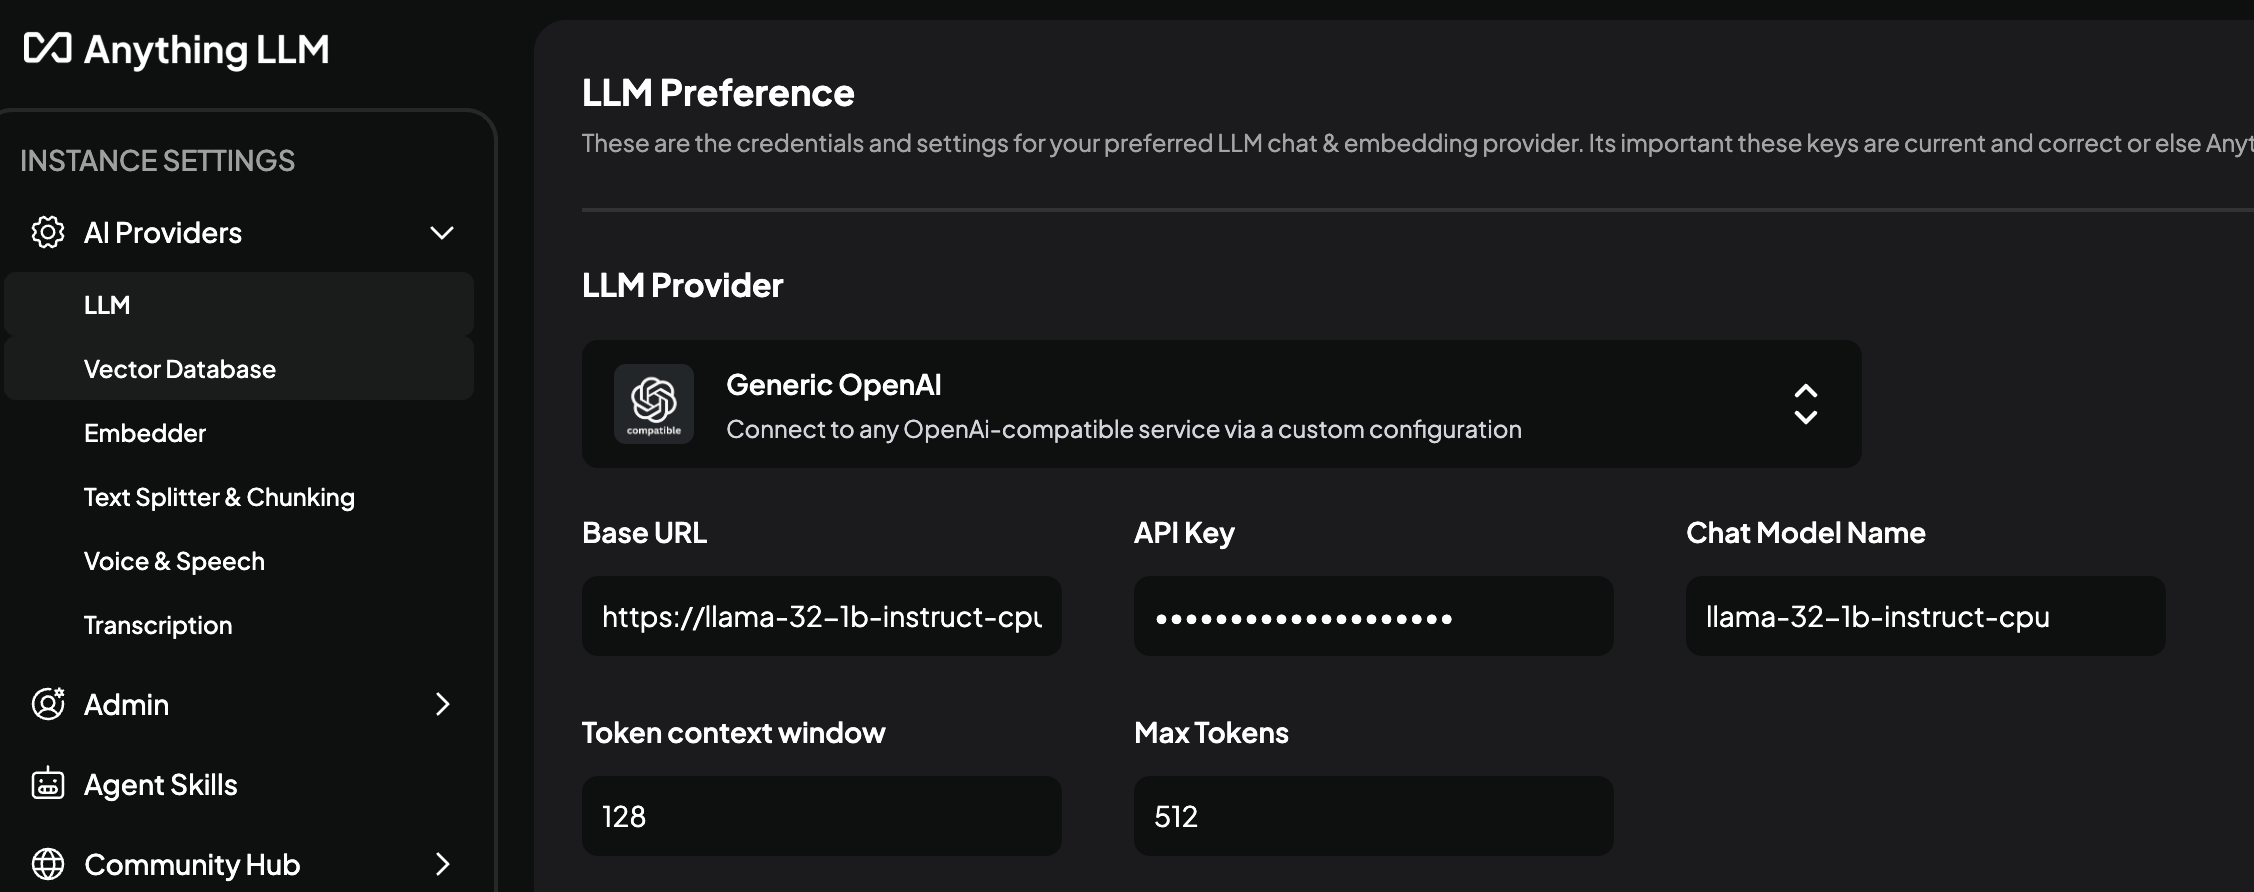
The model name when configuring AnythingLLM should be just |
And lastly re-configure AnythingLLM. The wrench icon at the bottom of the screen and navigate to API Providers → LLM to set the new URL, Key and Model Name.