Custom Runtime Images in RHOAI
Need for custom runtime image
RHOAI provides pre-build runtime images like Datascience with Python 3.11 (UBI9), Pytorch with CUDA and Python, Tensorflow with CUDA and Python etc. Data scientists can use these images to run their notebooks and projects.
These images come with most of the packages that one would need to run their Data Science projects. However, there might be cases where the user needs to install additional packages that are not available in the pre-built images. In such cases, the user can create a custom runtime image with the required packages.
Notebooks Repository
The notebooks repository uses a makefile to create the runtime image. The makefile is a file that contains a set of directives used by a make build automation tool to build a set of target images.
Take a look at the developer guide to understand the runtime image build chain.
Creating a custom runtime image
Using Podman to run the builder container:
We have created a container image that contains all the necessary tools to build the notebooks repository. This image is based on the repository: https://github.com/containers/image_build. You can find the image contents here: https://github.com/redhat-ai-services/rhoai-platform-foundation-bootcamp-instructions/tree/main/custom-notebook-builder-container/podman/Containerfile. This image is based on the latest fedora image and contains: podman, git, make, which, go, pip, python3.11 and pipenv.
The image has already been built for you and is located here: quay.io/asheet/custom-nb-builder-container:latest.
We can run this image using Podman and build/push our custom notebooks from within the container.
-
Run the following command to run the container on podman:
podman run -it --privileged --name custom-notebook-builder quay.io/asheet/custom-nb-builder-container:latestIf running on an M-powered Mac, you will need to use the --platform linux/amd64 flag to run the container.
podman run -it --privileged --platform linux/amd64 --name custom-notebook-builder quay.io/asheet/custom-nb-builder-container:latestThis will run the container and you will now be inside the container.
-
Clone the notebooks git repository with the following command:
git clone https://github.com/opendatahub-io/notebooks.git -
Navigate into the folder you just cloned.
cd notebooks -
Log into the quay.io registery from your CLI.
Generate quay.io cli password from settings
Log into quay.io and go to Account Settings in the top right. In the Account settings, Generate Encrypted Password.

Enter your password and then choose the Podman Login or Docker Login tab. Use this when logging into quay.io from Podman or Docker.
podman login -u='username' -p='password' quay.io -
Open the Makefile and try to understand the build chain.
-
Let’s add a Python Package to the runtime image-datascience-ubi9-python-3.11 image.
-
Change directory to the
runtimes/datascience/ubi9-python-3.11directory.cd runtimes/datascience/ubi9-python-3.11 -
Open the Pipfile in the
runtimes/datascience/ubi9-python-3.11directory. This file contains the list of Python packages that are installed in the image. -
Add a new Python package to the Pipfile. For example, let’s add the
artpackage to the Pipfile to match the custom notebook image built in earlier exercise.After line 21, add the following line and save the file:
art = "~=6.4.0" -
Use
pipenv lockto add the new package to thePipfile.lock. This updates the pip lock file with the new package. Run the following command:pipenv lock -
We will need to update the
requirements.txtfile. The notebooks repository has a handy script that will do this for us. Run the following command (still in theruntimes/datascience/ubi9-python-3.11directory):../../../scripts/sync-requirements-txt.shYou can now see that the Art package has been added to the
requirements.txtfile. As well as updating some of the existing packages. -
Now that we have added the new package to the image, we need to build the runtime image. Change directory to the root of the repository project. After running this command you should be in the
notebooksdirectory.cd ../../../ -
Let’s build the runtime-datascience-ubi9-python-3.11 image. Run the following command:
make runtime-datascience-ubi9-python-3.11 -e IMAGE_REGISTRY=quay.io/{quay_id}/runtime-images -e RELEASE=2024bIf using gmake
gmake runtime-datascience-ubi9-python-3.11 -e IMAGE_REGISTRY=quay.io/{quay_id}/runtime-images -e RELEASE=2024bNote: If you’re on a M-powered Mac, you need to build with
--platform linux/amd64. In the Makefile, you can add the --platform linux/amd64 build arguments to the container build command. Edit line 77 in the Makefile to be:$(eval BUILD_ARGS := --platform linux/amd64)This takes some time to build. It will build the base image first and then build the image on top of the base image. The image will then be pushed to the quay.io registry under your account in the runtime folder.
-
Check your quay registry to see the image you just built. https://quay.io/repository/quay_id/runtime-images?tab=tags
-
A new repository named
runtime-imageswill get created in your quay.io account. This will get created as a Private repository. Convert it into a public repository in the settings. -
If your not able to build runtime-image, you can use the pre-built image
quay.io/arckrish/custom-runtime-images:runtime-datascience-ubi9-python-3.11-2024b_20250527as a custom runtime image. -
You can now use this image in your custom notebook. Open custom-workbench in parasol-insurance project.
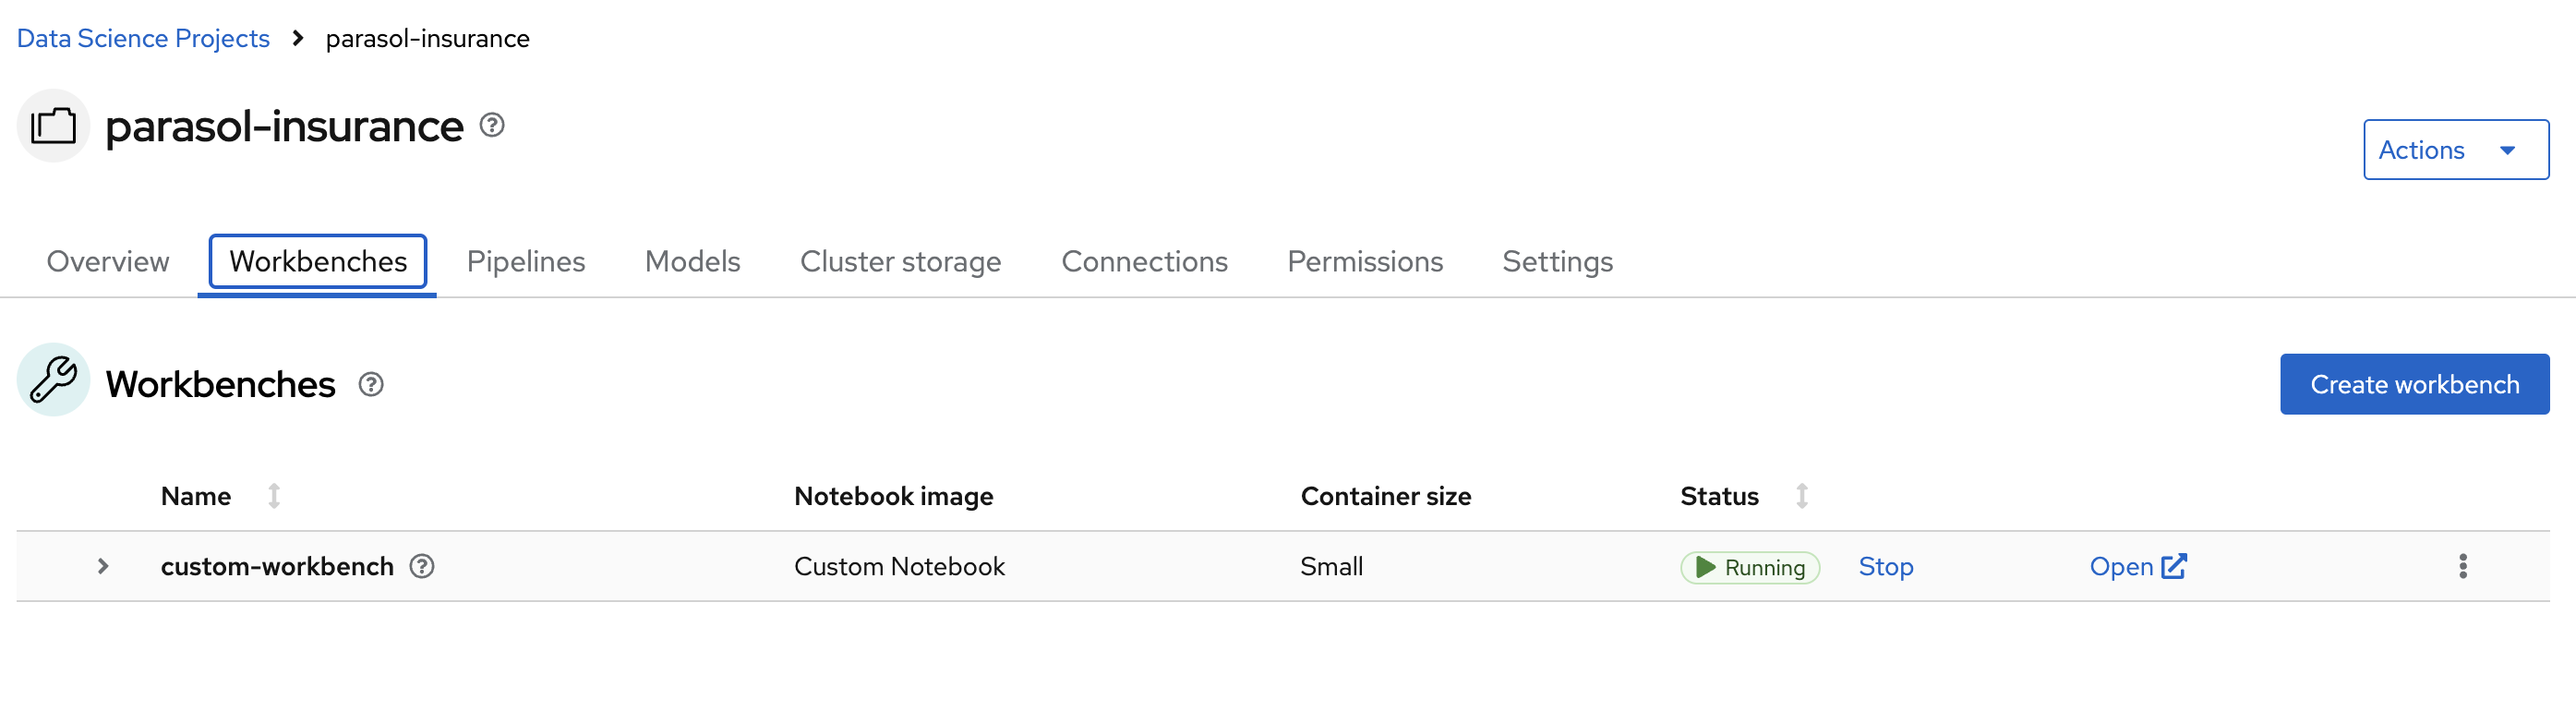
-
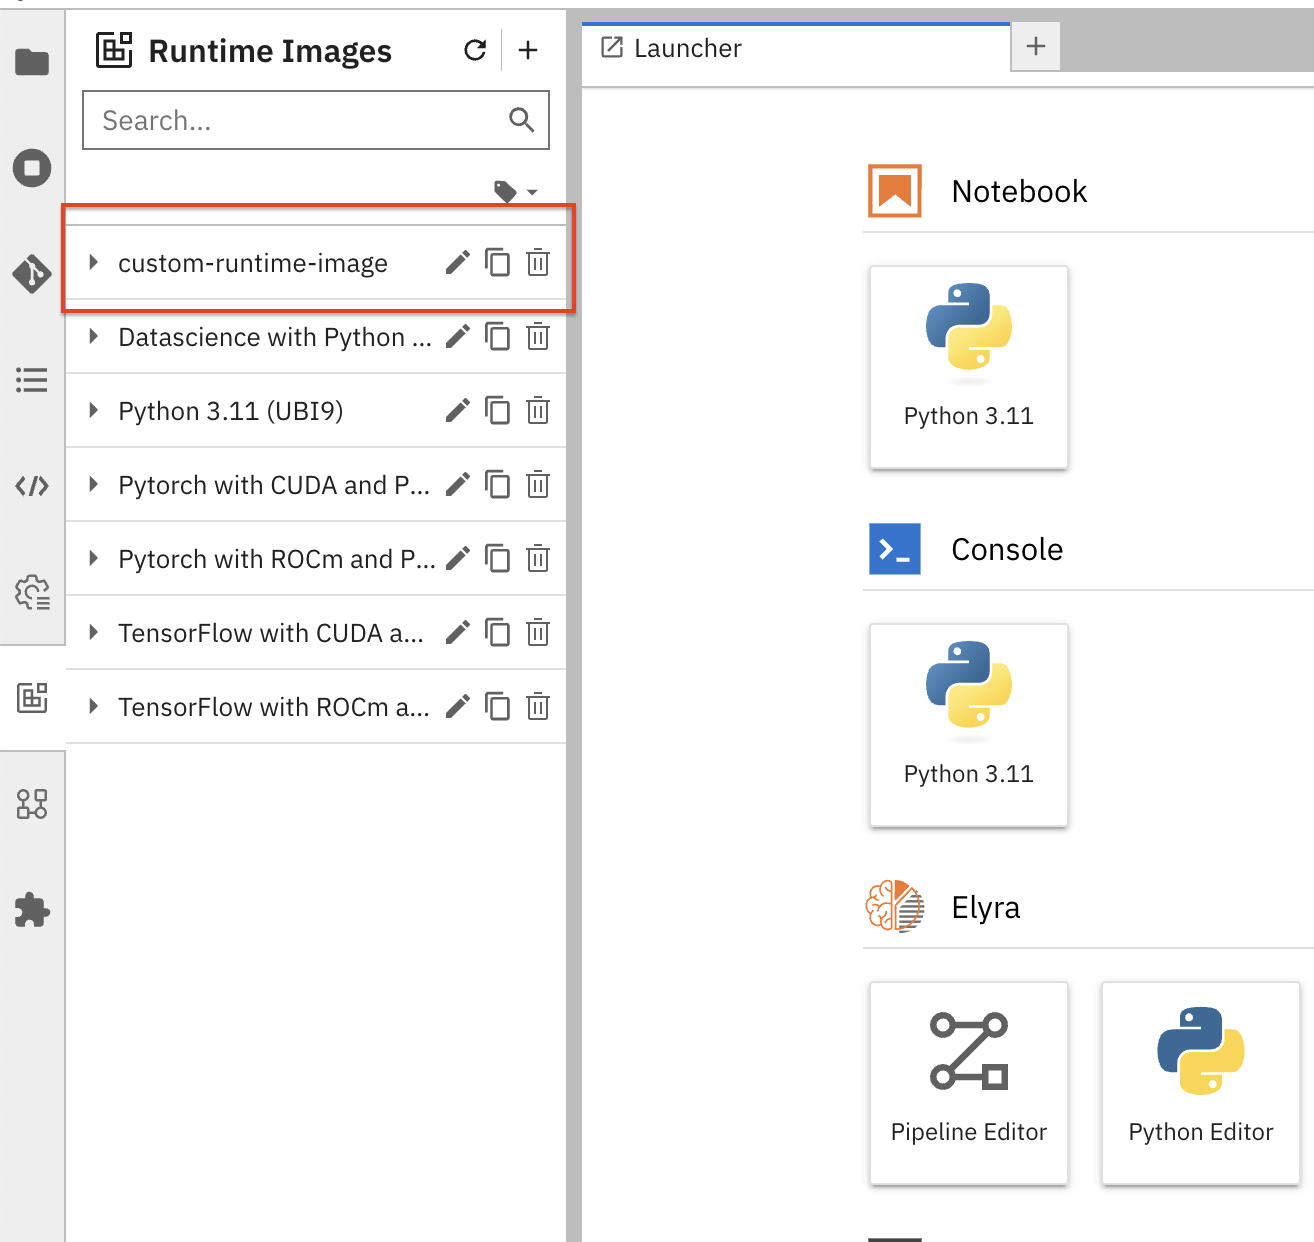
Click on Runtime Images on left menu
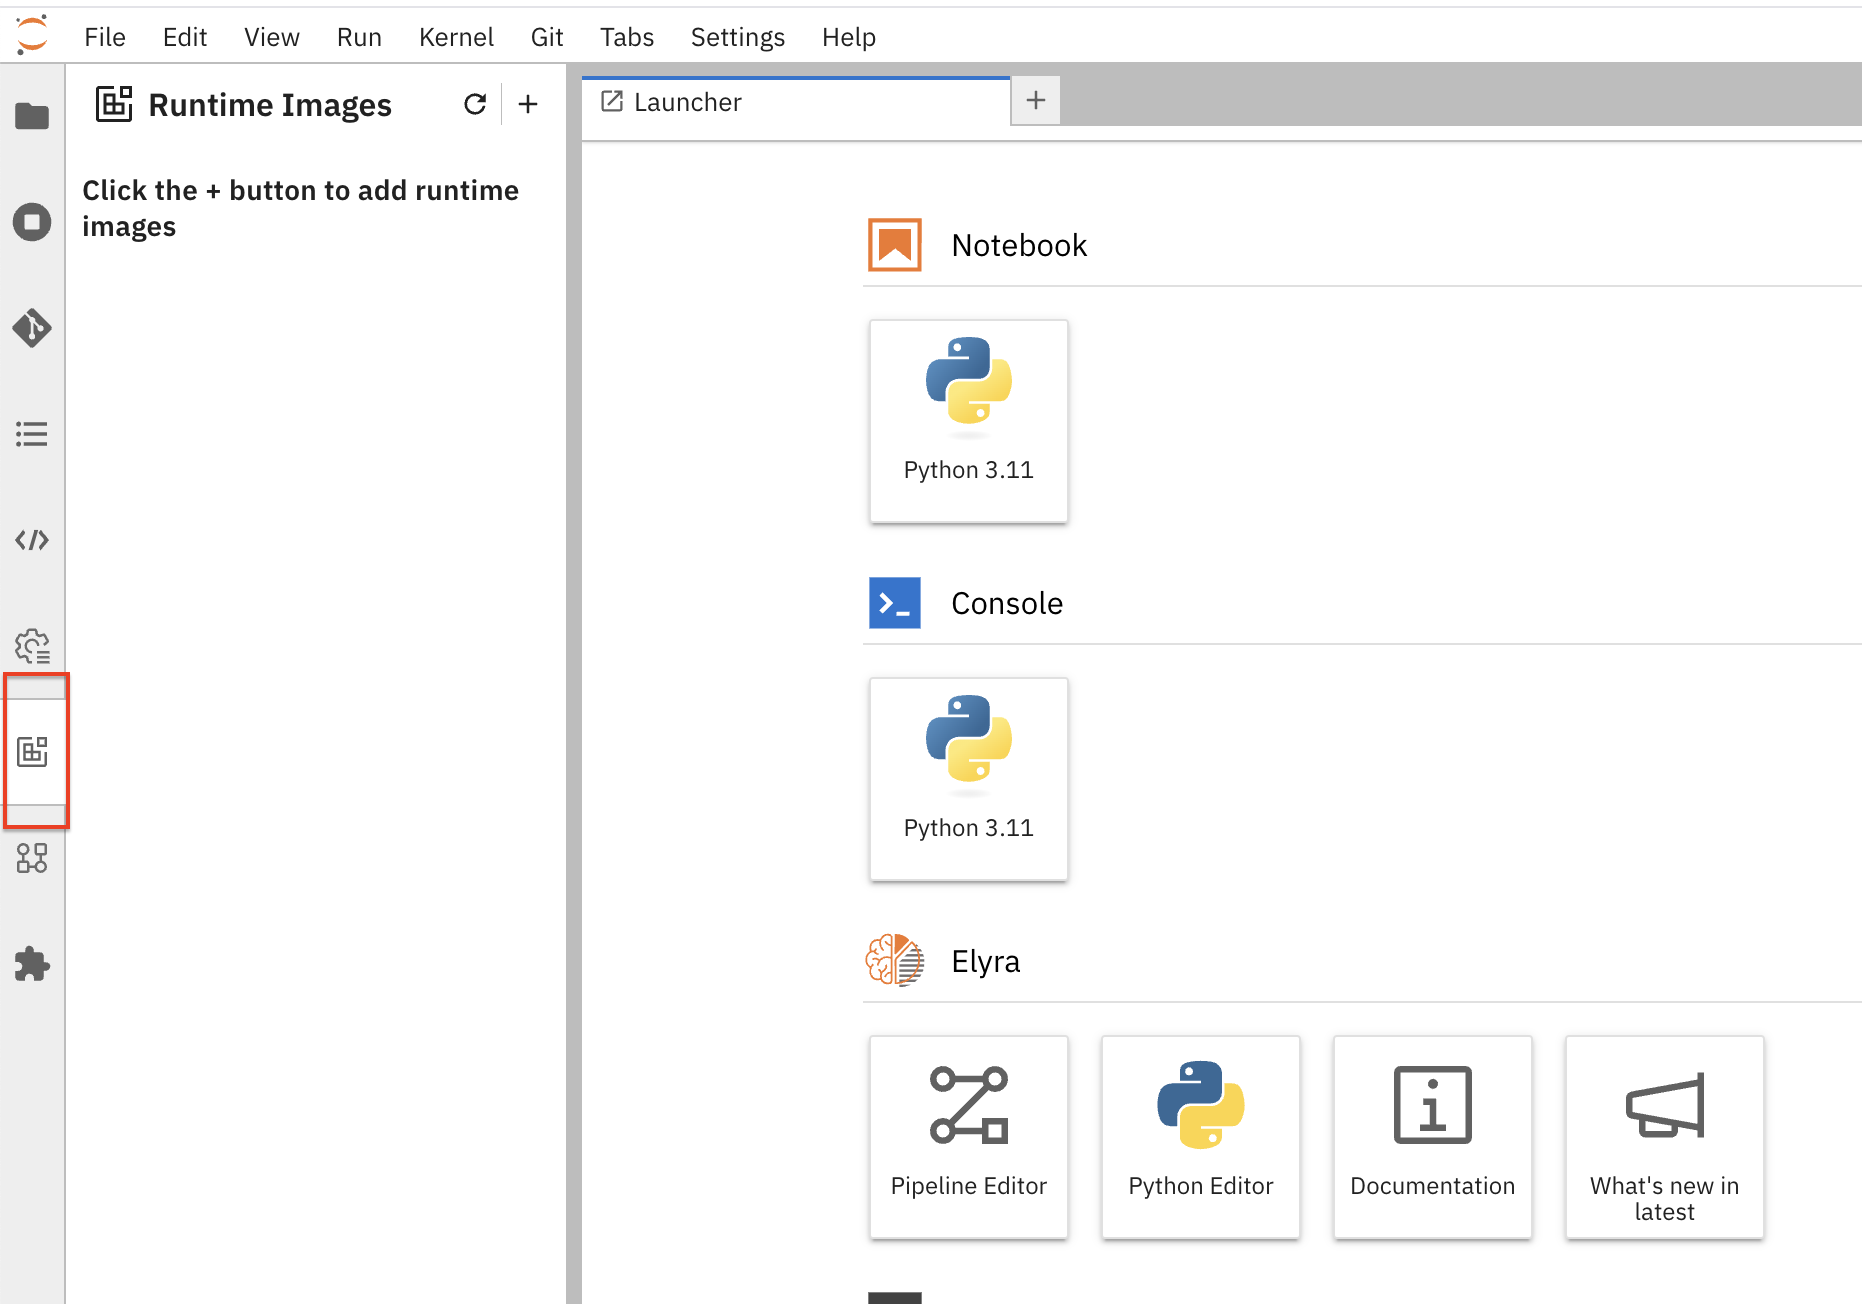
-
Click on + sign to add custom runtime image. Fill the following to add a new runtime image:
Display Name:custom-runtime-imageImage Name:pull quay.io/quay_id/runtime-images:runtime-datascience-ubi9-python-tagImage Pull Policy:AlwaysRuntime-Image
Please use this image if your unable to build a custom-image in the previous steps.
quay.io/arckrish/rt-images:runtime-datascience-ubi9-python-3.11-2023x_20250318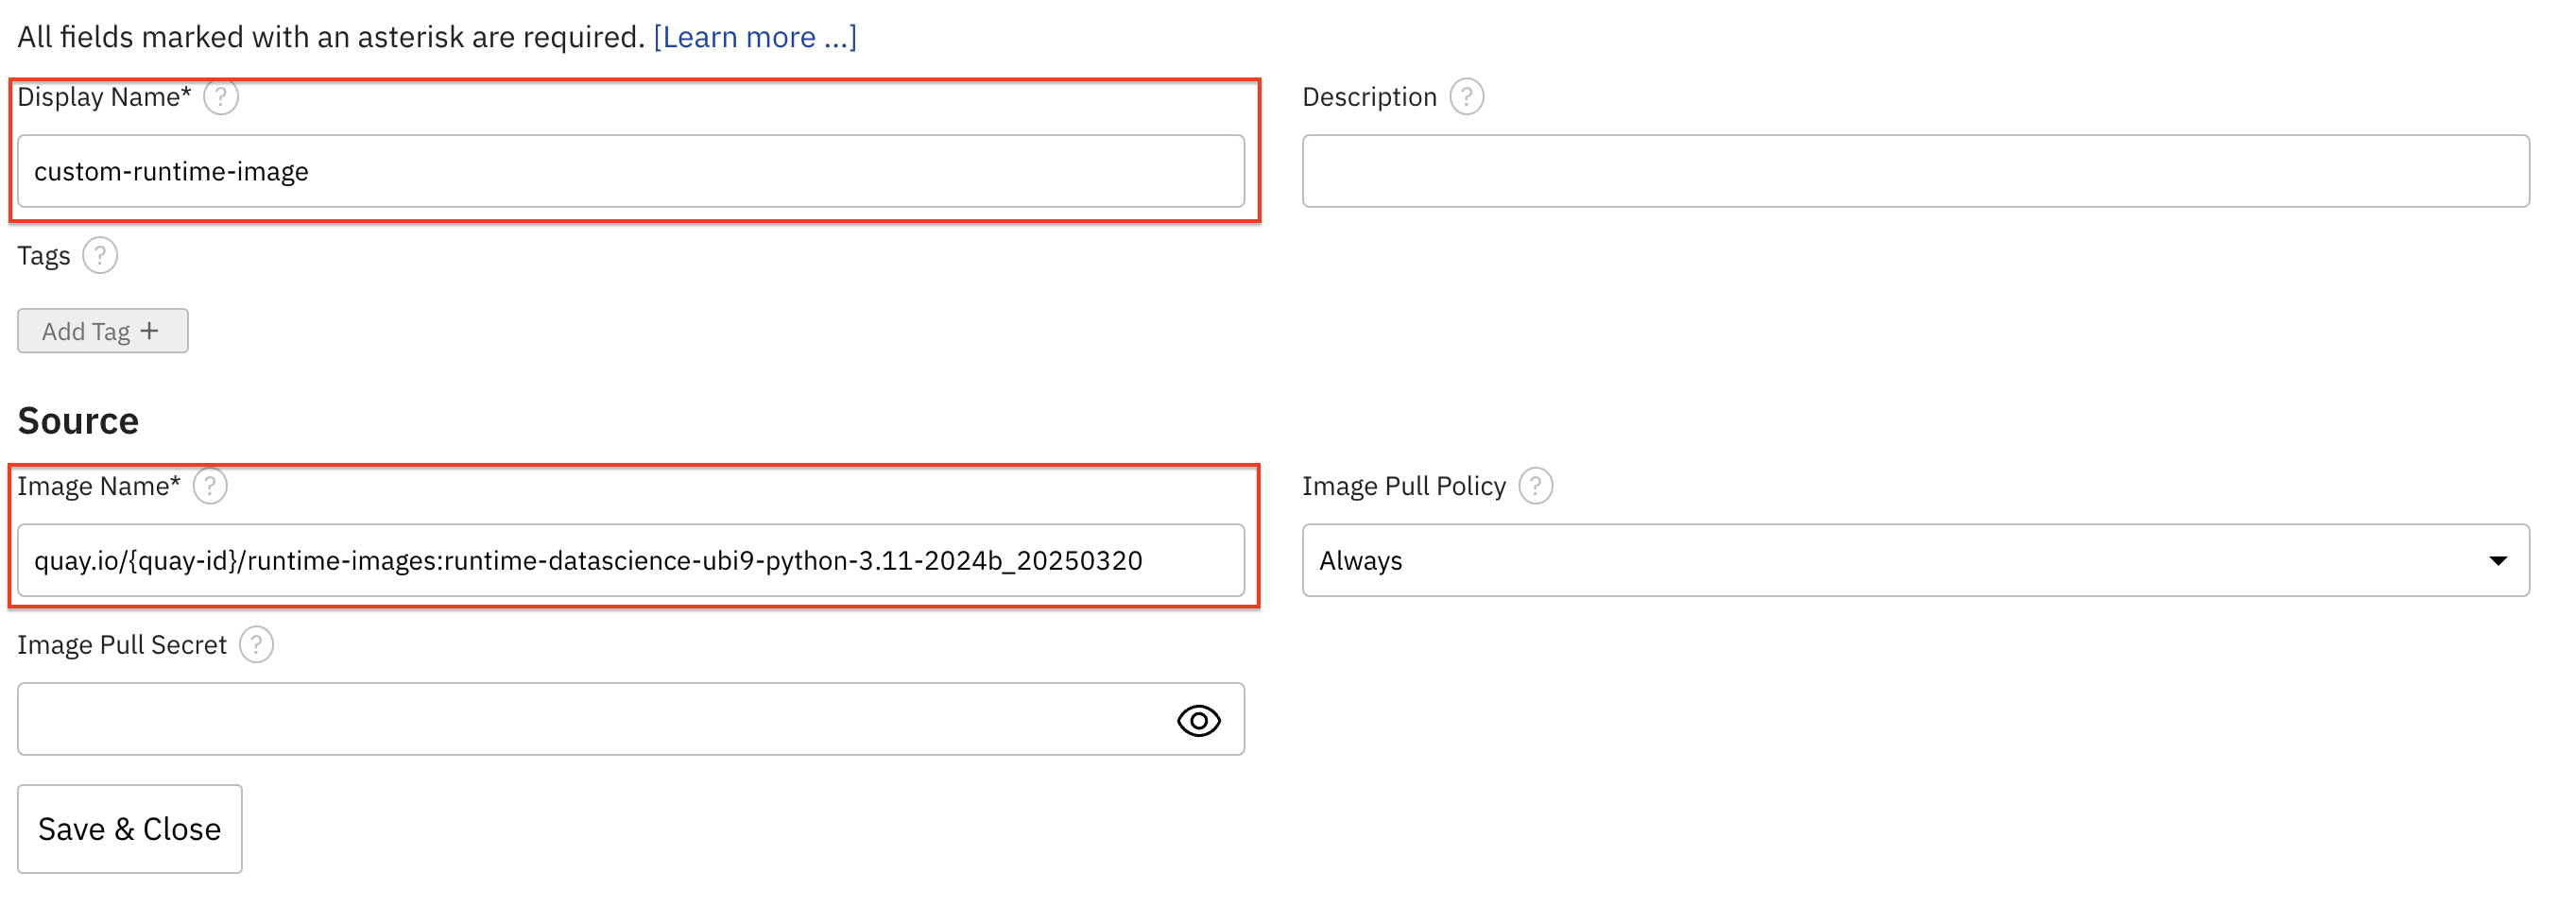
-
Click on Save and Close to save the runtime image.