Lab Exercise: Using MaaS as a Developer
This exercise will guide you through the process of deploying AnythingLLM as a custom workbench in OpenShift AI and configuring it to connect to a Large Language Model (LLM) that is being served via a Model-as-a-Service (MaaS) pattern with 3scale managing API access.
1. Finish configuring 3Scale developer portal
|
3Scale API Gateway has been provisioned by the |
To get this done do the following:
-
Get the 3Scale Admin user and password:
oc get secret system-seed -n 3scale -o template='{{range $key, $value := .data}}{{if or (eq $key "ADMIN_USER") (eq $key "ADMIN_PASSWORD")}}{{printf "%s: " $key}}{{ $value | base64decode }}{{"\n"}}{{end}}{{end}}' -
Open the Admin URL in a browser:
oc get routes -n 3scale -o json | jq -r '.items[] | select(.spec.host | contains("maas-admin")) | "https://"+.spec.host' -
Once you enter the credentials, dismiss the wizard by clicking the top right X icon.
-
Navigate to Dashboard → Audience → Developer Portal → Settings → Domains & Access


-
Delete the 'Developer Portal Access Code' and click Update Account

-
Now get the URL for the developer portal and try to access it:
-
URL
oc get routes -n 3scale -o json | jq -r '.items[] | select(.spec.host | startswith("maas.apps")) | "https://"+.spec.host' -
Click sign in and toggle the "Private login" and access with username: dev1, password: openshift

-
2. Ensure Model is served via MaaS (3scale) and obtain Model Endpoint, Name and API Key
Objective: Before you can configure AnythingLLM, you need to ensure that the LLM you wish to use is accessible through a Model-as-a-Service (MaaS) setup, specifically one that leverages 3scale for API management. You will also obtain the necessary connection details.
-
Get the Model URL, API Key and Model Name
After login into the Developer Portal:
-
Navigate to Apps and API Keys
-
You should see one application already registered called dev1, click on it.
-

-
Using those values copy/paste into these env variables in a terminal:
LLAMA_ENDPOINT=... LLAMA_API_KEY=... -
Test the following CURL to test the model endpoint (notice how the model name is pre-populated):
curl ${LLAMA_ENDPOINT}/v1/chat/completions \
    -H 'accept: application/json' \
    -H "Content-Type: application/json" \
    -H "Authorization: Bearer ${LLAMA_API_KEY}" \
    -d '{
    "model": "llama-32-1b-instruct-cpu",
    "stream": "true",
    "messages": [
        {
        "role": "user",
        "content": "Paris is a"
        }
    ]
    }'
If everything is ok, you will be able to see the streaming responses to this request, similar to following:

| This model is running on a CPU, do not expect big performance from running queries against it. |
3. Create and launch the AnythingLLM Workbench
Objective: Create a new workbench with AnythingLLM image.
-
Access Openshift AI
-
Navigate to the Data Science Projects and open the
LLM Host -
Click the create workbench
-
Configure Workbench Details:
-
Name: Choose a descriptive name, such as "anythingllm-wb".
-
Image selection: Select the pre-loaded "CUSTOM-AnythingLLM".
-
For version select
1.3.0 -
For Hardware Profile: Choose Small (a GPU is not required for this since is just a web server).
-
Leave the remaining settings as default and click Create.
-
Custom workbench using AnythingLLM:

-
-
-
Next, wait for the workbench to start, this starts a process to retrieve the image and run the pod.

-
When available press the workbench image to open the URL in a separate browser tab and enter
kubeadmin

Now let’s configure AnythingLLM…
4. Configure the LLM Endpoint within AnythingLLM
Objective: This is the critical step where you connect your AnythingLLM workbench to the LLM model served by 3scale, using the API key and endpoint details obtained in Step 2.
-
Choose Provider: In the AnythingLLM configuration interface, select Generic OpenAI as the Provider from the available options.
-
Enter Base URL: Enter the Endpoint URL you obtained from 3scale as the Base URL. This URL should typically end with /v1 (e.g., https://mistral-7b-instruct-v0-3-mycluster.com:443/v1).
-
Enter API Key and Model Name: Enter the API Key and specify the Model Name that you received from 3scale.
-
Set Token Context Window and Max Tokens: Set the Token Context Window size to 512 and Max Tokens to be generated to 1024.

5. Final Setup and Interaction
Objective: Complete the AnythingLLM setup and begin using your private chatbot powered by the 3scale-served LLM.
-
Set Up User Access: On the next screen, select "Just me". OpenShift’s authentication already secures access to your workbench, so a secondary password is not typically necessary.
-
Review Configuration: Review the summary screen to confirm that all your settings are correct. You may skip any brief survey if prompted.
-
Create Workspace: Click on Create Workspace. This will set up a project area within AnythingLLM where you can organize different tasks and data.
-
Start Chatting: Navigate to your newly created workspace and begin interacting with the LLM. You can now explore the various features of AnythingLLM.
|
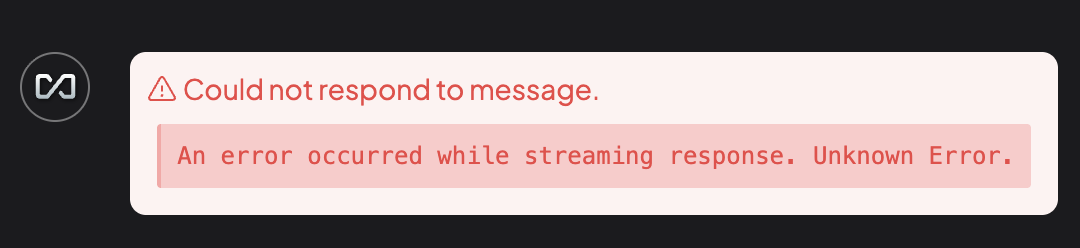
It is expected that at this point you might get an error from the API since it is being served with a CPU and it will hit a 504 - gateway timeout presenting an error like this:
Let’s fix that by setting up a new model with GPUs in the next exercise! |