Deploying RH Inference Server on RHEL
This section will walk you through deploying RH Inference server on RHEL.
Login to bastion
First, we’ll login to the bastion server that we’ll be installing Red Hat Inference server to.
Open a terminal and execute the below command.
ssh ec2-user@<YOUR_BASTION_ADDRESS>Host Verification
Before proceeding, it is critical to verify that the host environment is correctly configured. Check Driver Status: After the system reboots, run the nvidia-smi (NVIDIA System Management Interface) command. A successful configuration will display a table listing all detected NVIDIA GPUs, their driver versions, and CUDA versions.14
nvidia-smi
Install nvidia-container-toolkit
The NVIDIA Container Toolkit is the crucial bridge that allows container runtimes like Podman or Docker to securely access the host’s GPUs.
curl -s -L https://nvidia.github.io/libnvidia-container/stable/rpm/nvidia-container-toolkit.repo | \
  sudo tee /etc/yum.repos.d/nvidia-container-toolkit.repo
sudo dnf-config-manager --enable nvidia-container-toolkit-experimental
sudo dnf install -y nvidia-container-toolkit
Configure CDI
sudo nvidia-ctk cdi generate --output=/etc/cdi/nvidia.yaml
# check the config
nvidia-ctk cdi list
Test Container-GPU Access: To confirm that Podman can access the GPUs, run a simple test workload using a standard NVIDIA CUDA sample image. This step definitively validates the entire stack, from the driver to the container runtime.
sudo podman run --rm --device nvidia.com/gpu=all nvcr.io/nvidia/k8s/cuda-sample:vectoradd-cuda11.7.1-ubi8
podman run --rm -it \
--security-opt=label=disable \
--device nvidia.com/gpu=all \
nvcr.io/nvidia/cuda:12.4.1-base-ubi9 \
nvidia-smi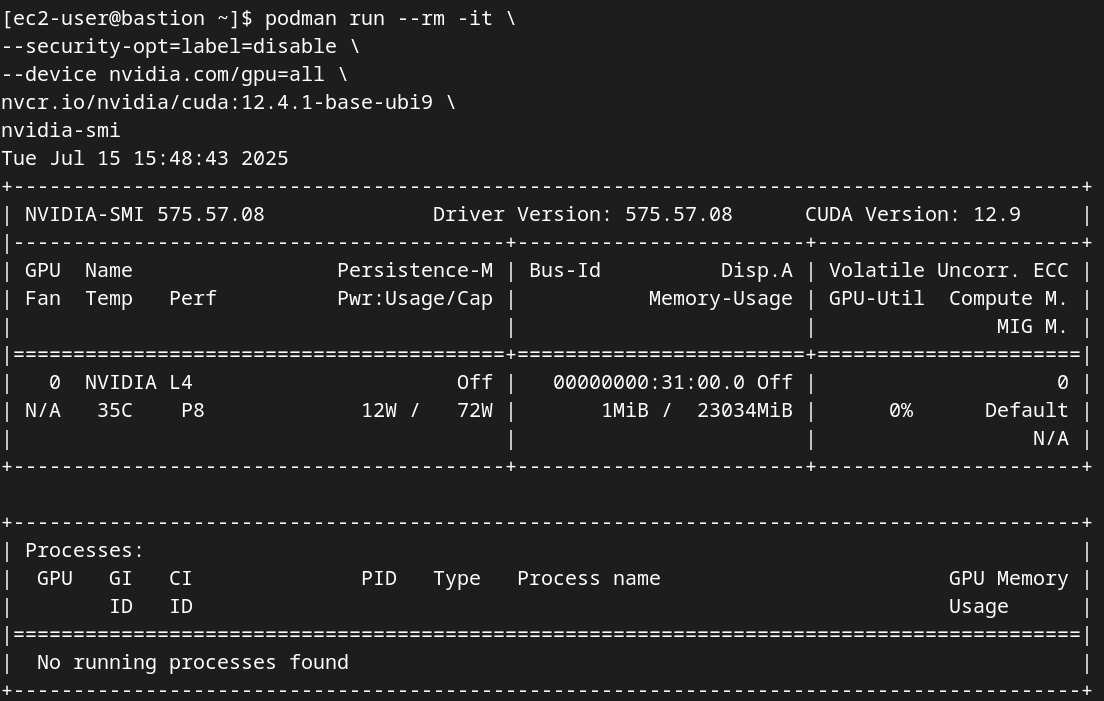
Logging Into Red Hat Container Registry
Login to registry.redhat.io
sudo podman login registry.redhat.ioUse your known credentials. If you need to generate new ones, you will need to create a new service account.
Creating a Service Account
-
First, go to https://access.redhat.com/terms-based-registry/ and login to create a new service account. Follow the steps to create a new account, if needed. (NOTE: Your Red Hat company account may not work. If not, create a new account with another email address.)
-
Once logged in, click on New Service Account to create a new service account.
-
In the presented form, create a new Registry Service Account by entering a Name for the account and an optional Description for the account.
If you receive a terms required error, then click on Please accept Red Hat’s Terms and Conditions to launch the acceptance process. Read through the terms and accept them. Close the newly created browser tab. -
Once complete, you will see your new service account name.
-
Click on the hyperlinked Account Name to get the credentials needed for the registry authentication. On the following page, make note of the Username and Password. Click the copy icon to place the entire password token onto the Clipboard.
Running vLLM on RHEL
Clone the workshop repository with pod deployment forRH Inference server for RHEL.
git clone https://github.com/redhat-ai-services/etx-llm-optimization-and-inference-leveraging.git
cd etx-llm-optimization-and-inference-leveraging
Run the vllm pod
sudo podman kube play workshop_code/deploy_vllm/rhaiis_rhel/vllm-pod.yamlOpen a new terminal to follow the logs.
sudo podman logs --follow vllm-vllmList all of the models deployed on the RH Inference server.
curl http://127.0.0.1:80/v1/modelsGo back to your original terminal and send in a request to the model endpoint.
curl -X POST -H "Content-Type: application/json" -d '{
    "prompt": "What is the capital of France?",
    "max_tokens": 100
}' http://127.0.0.1:80/v1/completions | jq
Go to your other terminal and view the logs. You should see a successful log entry.
